
Jekyll Setup
When I first made this website I created every single page individually and painstakingly tested each and every link and each and every margin/padding and design of the page. I started thinking to myself “This is going to become extremely hard once I add more than 10 blog entries to the site… There must be another way…” That’s when I discovered Jekyll.
Jekyll is a ruby gem program available on many linux distributions that allows you to make a dynamic website into static pages to be hosted on a simple webhoster such as Github Pages. Using this tool, you can create a website that has thousands of blog posts and not have to worry about writing each page separately.
Installing Jekyll on a linux distribution is fairly straight forward, just make sure you have rubygems installed and up to date and follow the instructions found on the (Jekyll Homepage).
On windows you have two options. Ruby can be used on windows via Ruby Installer for Windows and then used via PowerShell or CMD. Another way to run Jekyll on Windows is to use the Linux Subsystem for Windows - which if you have need for any other linux based tools, is a very useful addition to Windows 10. This is the method that I use regularly as my main driver is a Custom Built Desktop running Windows 10.
Once Jekyll is installed simply run jekyll new [mywebsite] in the directory that you want your new site to be. Then cd into that directory and run the following bundle exec jekyll serve to host the website on your own network for testing and development, or use bundle exec jekyll build to generate the static files used to host your site on a website hoster such as Github Pages.
If the last command is successful, you should get the following result;
 A Snapshot showing a successful output
 (Click to view Larger)
Now you can navigate to localhost:4000 in your web browser to view your newly created website.
To get your new site ready for static web hosting, there are a few variables that need to be changed in the _config.yml file - mainly the baseurl and url variables. These variables tell jekyll the url of your site (e.g., “http://mljl.tech”) and the baseurl of your site (e.g., “/blog” in “http://mljl.tech/blog”), all the other variables may be filled in or left as they are.
Advanced Section
Your _config.yml file can also be used to help the creation of other pages by taking advantage of custom variables. Variables created in your config file can be used globally, but the server must be restarted before they take effect as the config file is exempt from auto-regeneration. We will delve deeper into how and why we do this and further usage examples later.
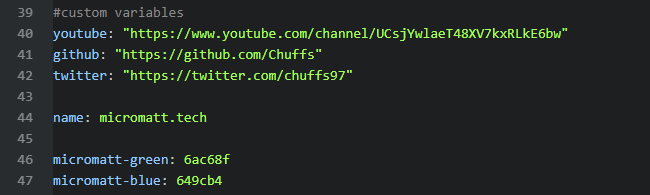 Some of the custom variables set for mljl.tech
 (Click to view Larger)
One issue that I came across when creating this website was differences in the url of pages and content that didn’t coincide, both when the files had been hosted on GitHub Pages as well as locally hosted. This was because Jekyll was using the baseurl and url defined in my _config.yml and that did not match with the location of the files hosted on localhost (and vice versa). The way around this was to define a second config file that was used in development, and use overlapping variables. To overcome this I created a second config file named _config_dev.yml and used the argument --config when starting the server locally.
I still use bundle exec jekyll build to produce the static files to upload to GitHub Pages, but now use bundle exec jekyl serve --config '_config.yml,_config_dev.yml' when I want to test the site locally and make changes to it.
I hope that this first lesson has been useful and helpful to those of you who would like to try their hand at making their own website (without tools such as Squarespace or other ‘Drag and Drop’ website creators). If you have any issues, feel free to post a comment below and I’ll do my best to help you out.
Further Reading and Useful Links
- Jekyll Documentation on configuration, namely Configuration Options, which gives you all the commands and variables you can use in the
_config.ymlfile.
Comments
No Comments found! Start the discussion below!
Post a comment
All comments are held for moderation; basic HTML or Markdown formatting accepted.